How to Install a Flat Roof: A Professional Step-by-Step Guide
TL;DR — Key Points:
- Flat roof installation is a multi-layer process — structural deck, vapor barrier, insulation, and membrane must all work together as a system
- Material selection comes first — TPO, EPDM, PVC, and modified bitumen each have distinct installation requirements
- Slope must be built in from the start — minimum 1/4″ per foot; a level deck will fail regardless of membrane quality
- Deck preparation is non-negotiable — clean, dry, and structurally sound before anything else goes on
- Flashing and edge details determine longevity — the majority of flat roof failures begin at transitions, not in the field membrane
- Permits and codes apply — most jurisdictions require permits for flat roof installation; always check locally
- Professional installation is strongly recommended — improper installation voids manufacturer warranties and leads to premature failure
Installing a flat roof is a complex, multi-stage process that requires careful planning, the right materials, and precise execution at every step. Unlike sloped roofing where gravity does much of the waterproofing work, flat roofing systems rely entirely on the quality of their materials and the skill of their installation to keep water out. A single misstep — a poorly welded seam, an inadequately flashed parapet, or a drainage system installed in the wrong location — can compromise the entire system.
At The Flat Roof Specialists, we’ve been installing flat roofs on commercial and residential properties throughout North Carolina, South Carolina, Tennessee, Georgia, and Virginia for over 25 years. With more than 100 five-star reviews and certified expertise across every major flat roofing system, we bring professional-grade knowledge to every installation. We proudly serve Raleigh, Durham, Chapel Hill, Burlington, Greensboro, High Point, Winston-Salem, and Fayetteville. If you’re considering a flat roof installation and want it done right, call us at 919-834-7663 to request a quote.
Step 1: Planning, Design, and Permitting
A successful flat roof installation begins long before anyone sets foot on the roof. The planning phase determines the system that will be used, the drainage layout, the insulation specification, and the structural requirements — and it’s where most of the decisions that affect long-term performance are made.
Choose Your Roofing System
The four primary flat roofing systems used in commercial and residential construction each have distinct performance characteristics, installation requirements, and cost profiles:
- TPO (Thermoplastic Polyolefin) — the most popular choice for new commercial installations today. Heat-welded seams, white reflective surface, and strong energy efficiency credentials make it the go-to for most applications across our NC, SC, TN, GA, and VA service area.
- EPDM (Ethylene Propylene Diene Monomer) — a proven rubber membrane with a multi-decade track record. Excellent flexibility and weather resistance; particularly cost-effective for large, simple roof areas.
- PVC (Polyvinyl Chloride) — the premium single-ply option. Superior chemical resistance makes it ideal for restaurants and industrial facilities; heat-welded seams offer outstanding long-term strength.
- Modified Bitumen — a multi-layer asphalt-based system offering excellent puncture resistance and redundant waterproofing. Popular for roofs with significant foot traffic or where multi-layer protection is preferred.
Material selection should be driven by building type, climate, budget, energy efficiency goals, and maintenance preferences — not just upfront cost. Our teams work with property owners across Raleigh, Greensboro, and throughout our service states to select the system best suited to their specific building and long-term goals.
Design Drainage and Slope
Drainage design must happen at the planning stage, not as an afterthought. Determine where drains, scuppers, or gutters will be located, and ensure that the structural design or insulation layout will create adequate slope — a minimum of 1/4 inch per foot — directing all water toward those outlets. Attempting to correct inadequate drainage after a membrane is installed is expensive and disruptive.
Obtain Permits
Most jurisdictions across our service states require building permits for flat roof installation, particularly on new construction and significant re-roofing projects. Check with your local building department in Raleigh, Durham, Burlington, or wherever your property is located before starting work. Unpermitted roofing work can create complications with insurance claims, property sales, and future financing.
Step 2: Structural Deck Preparation
The roof deck is the foundation of the entire system. Every subsequent layer depends on the deck being structurally sound, dimensionally stable, and properly prepared. Cutting corners at this stage creates problems that no amount of quality membrane or skilled installation can overcome.
Inspect and Repair Existing Decking
For re-roofing projects, the existing deck must be thoroughly inspected before any new material is applied. Walk the entire deck surface checking for soft spots, rot, delamination, and damaged or missing fasteners. Any compromised sections must be replaced entirely — not patched over. Plywood or OSB decking that has absorbed moisture must be allowed to dry fully or replaced before installation proceeds.
Our inspection teams regularly discover concealed deck damage during re-roofing projects in Winston-Salem, High Point, and across our service area — damage that would have been sealed beneath new insulation and membrane if the deck hadn’t been properly evaluated first. Finding and fixing these issues before installation begins protects both the new roof system and the building structure beneath it.
New Deck Installation
For new construction, the structural deck is typically 3/4-inch tongue-and-groove plywood or properly rated OSB installed over the structural framing. Panels must be installed with their long axis perpendicular to the framing members, staggered at joints, and fastened at the spacing required by the structural design. All panel edges must be supported, and any gaps or unevenness must be addressed before insulation goes down.
Surface Preparation
Regardless of whether the deck is new or existing, the surface must be clean, completely dry, and free of any protrusions — raised fasteners, debris, or irregularities — before insulation or membrane installation begins. Even minor surface irregularities can telegraph through insulation boards and membrane layers, creating stress points that lead to premature failure.
Step 3: Vapor Barrier Installation
A vapor barrier — also called a vapor retarder — is installed on top of the structural deck to control moisture migration from the building interior upward into the roof assembly. In warm, humid climates like those throughout much of our North Carolina and Georgia service area, vapor control is particularly important. Moisture that penetrates the roof assembly and condenses on cold surfaces leads to insulation degradation, deck rot, and membrane failure from below.
The vapor barrier is typically a polyethylene sheet or foil-faced material that is lapped and sealed at all joints and taped around all penetrations to create a continuous, unbroken barrier. It should be installed as close to the interior face of the assembly as possible — the warm side — to keep moisture-laden air from reaching the cooler layers above.
For mechanically attached membrane systems, vapor barrier selection must be coordinated with the fastener pattern used in the insulation and membrane layers above, as fasteners will penetrate the vapor barrier and require appropriate sealing.

Step 4: Insulation Installation
Insulation serves two functions in a flat roof assembly: it provides thermal resistance to reduce heating and cooling costs, and — when tapered — it creates the slope needed for proper drainage. Getting insulation right is critical to both energy performance and long-term drainage behavior.
Insulation Type and Specification
Polyisocyanurate (polyiso) board is the most widely used flat roof insulation, offering the highest R-value per inch of any commonly available rigid board — approximately R-6 per inch. It is installed in multiple layers with joints staggered between layers to eliminate thermal bridging and create a more uniform thermal barrier.
In high-humidity environments, a cover board — typically a layer of high-density polyiso, gypsum board, or wood fiber — is installed as the top insulation layer to provide a stable, puncture-resistant substrate for membrane attachment and to protect the insulation from damage during installation and subsequent maintenance traffic.
Tapered Insulation for Slope
When the structural deck is level or has insufficient slope, tapered insulation boards are used to create the required drainage gradient. Tapered insulation layouts must be carefully designed so that all drainage zones slope consistently toward outlet locations — a process that requires planning the layout of every board before installation begins. Our commercial installation teams design and install tapered insulation systems throughout Chapel Hill, Fayetteville, and across our five-state service area as a standard part of comprehensive flat roof projects.
Attachment Methods
Insulation boards are attached to the deck using one of three methods: mechanical fastening with screws and plates, full or partial adhesive bonding, or — for ballasted systems — left unattached with the weight of the ballast providing stability. The attachment method must be specified based on wind uplift requirements for the building’s location and height, local building codes, and compatibility with the chosen membrane system.
Step 5: Drain and Outlet Installation
All drain hardware — internal drain bodies, overflow drains, and any scupper frames — must be installed and properly flashed before the membrane goes down. Attempting to install or modify drainage outlets after membrane installation creates penetration points that compromise waterproofing integrity.
Internal drains connect to the building’s plumbing system and are positioned at the low points created by the tapered insulation layout. Each drain body must be set at the correct elevation relative to the finished insulation surface, and the surrounding insulation must be cut and fitted carefully to ensure a smooth, well-supported transition to the drain flange.
Overflow drains or scuppers are positioned slightly above the primary drain elevation and provide emergency relief if primary drains become blocked. Building codes across our service states require overflow provisions — their absence is a common deficiency we find during inspections throughout Greensboro, Burlington, and the surrounding region.
Step 6: Membrane Installation
The membrane installation is the most visible and technically demanding phase of flat roof installation. Each membrane type has specific installation requirements, and the quality of membrane installation — particularly at seams and transitions — determines the long-term waterproofing performance of the entire system.
TPO and PVC Membrane Installation
Single-ply TPO and PVC membranes are typically installed using one of three attachment methods. In a fully adhered system, the membrane is bonded directly to the cover board using a compatible bonding adhesive applied to both surfaces and allowed to flash off before the membrane is rolled into position. In a mechanically attached system, the membrane is secured to the deck through rows of fasteners and plates placed at the seams, with the overlapping membrane from adjacent sheets covering the fastener row. In a ballasted system, the membrane is left unattached and held in place by stone ballast or pavers.
Seams between membrane sheets are the most critical element of TPO and PVC installation. Seams are heat-welded using a hot air gun — a tool that blows air at precisely controlled temperatures to melt the overlapping membrane surfaces and fuse them into a single, homogeneous bond. Seam welds must be checked for continuity using a probe tool, and any voids or weak spots must be repaired immediately. A properly welded TPO or PVC seam is actually stronger than the membrane itself — it won’t be the seam that fails if installation is done correctly.
EPDM Membrane Installation
EPDM rubber membranes are available in large sheet sizes — up to 50 feet wide — that minimize the number of seams required. Sheets are positioned, lapped at seams by a minimum of 3 inches, and bonded using EPDM-specific lap adhesive or factory-applied seam tape systems. Unlike TPO and PVC, EPDM seams are not heat-welded — they rely on adhesive or tape bonding, which requires careful surface preparation and application technique to achieve reliable, long-term performance.
Modified Bitumen Installation
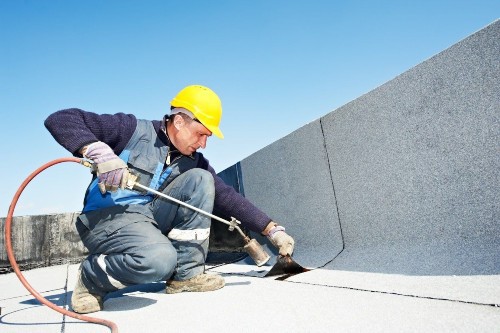
Modified bitumen systems are installed in multiple layers — typically a base sheet followed by one or more cap sheets — using torch application, hot asphalt, or cold adhesive depending on the specific product and project requirements. Each layer is applied with lapped seams offset from the layer below, and the cap sheet provides the finished weathering surface. Torch application requires trained operators with appropriate fire safety equipment and permits.
Step 7: Flashing All Transitions and Penetrations
Flashing is the process of sealing the membrane system at every point where it meets a vertical surface, changes direction, or is penetrated by equipment, pipes, or structural elements. This is the most labor-intensive and detail-oriented phase of flat roof installation — and the one where the skill gap between professional and amateur installation is most pronounced.
Every parapet wall requires the membrane to turn up the vertical face and terminate under a metal coping cap or into a reglet in the masonry. HVAC equipment curbs, skylights, and roof hatches require prefabricated or field-fabricated curb flashings that integrate with the field membrane and extend above any anticipated water level on the roof surface. Every pipe penetration requires a pipe boot or pitch pocket that is carefully integrated with the surrounding membrane. Every roof edge without a parapet requires a metal edge termination that holds the membrane securely and sheds water cleanly.
Studies consistently show that the overwhelming majority of flat roof leaks originate at flashing details rather than in the field membrane. This makes flashing quality — not just membrane quality — the true measure of a flat roof installation. Our certified installation teams in Raleigh, Durham, and throughout our five-state service area bring over 25 years of flashing experience to every project, and our 100+ five-star reviews are a direct reflection of the quality and durability that professional flashing installation delivers.
Step 8: Final Inspection and Quality Assurance
Once membrane and flashing installation is complete, a comprehensive quality assurance inspection must be performed before the project is considered finished. This inspection verifies seam integrity across the entire roof, checks all flashing terminations for proper adhesion and sealing, confirms that all drains are properly integrated and unobstructed, and documents the completed installation with photographs.
For manufacturer warranty activation, most roofing material manufacturers require a post-installation inspection by a certified contractor — and sometimes by their own representative — to verify that installation meets their specifications. This inspection is not optional if warranty coverage is important to you, and it’s one of the key reasons to work with a certified installation contractor from the outset.
Any deficiencies identified during the final inspection must be corrected before the project is closed out. A reputable contractor will conduct this inspection thoroughly and address any issues without additional charge as part of their standard installation process.
Why Professional Installation Makes All the Difference
Flat roof installation is one of those projects where the cost of doing it wrong dramatically exceeds the cost of doing it right the first time. A poorly installed membrane that fails within two to three years — rather than lasting 20 to 30 — means paying for a complete re-roof plus any interior damage caused by leaks in the interim. Manufacturer warranties are voided by improper installation. Insurance claims may be denied if substandard work contributed to damage. And in commercial settings, roof failures cause business interruptions that compound the financial impact far beyond the repair cost itself.
At The Flat Roof Specialists, we are your certified and experienced commercial and residential roofing experts. We specialize in commercial flat roofing installation, repair, and maintenance throughout NC, SC, TN, GA, and VA, and also offer top-quality residential roofing services — especially if your home has a flat roof. Every installation we complete is backed by our commitment to quality, our manufacturer certifications, and our track record of more than 100 five-star reviews built over 25+ years in business.
Be sure to watch our YouTube videos, read our reviews, and check out our extensive gallery to see our recent installation and repair work. Whether you’re planning a new commercial flat roof installation or replacing an aging system, give us a call today at 919-834-7663 to request a quote. We’ll assess your project, recommend the right system for your building and budget, and deliver an installation that performs for decades — not just years.